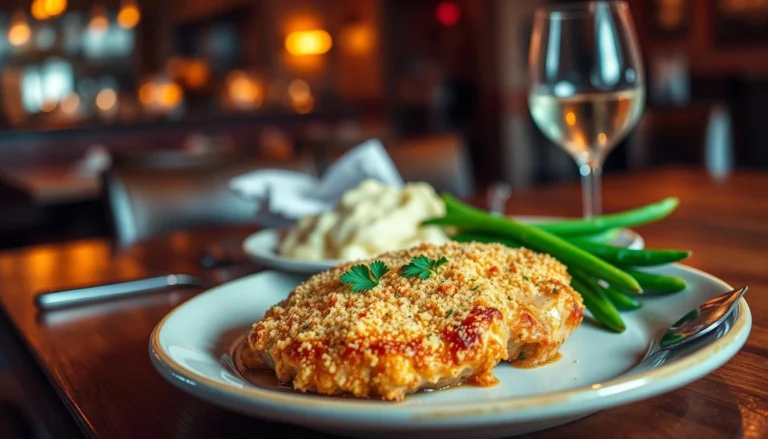
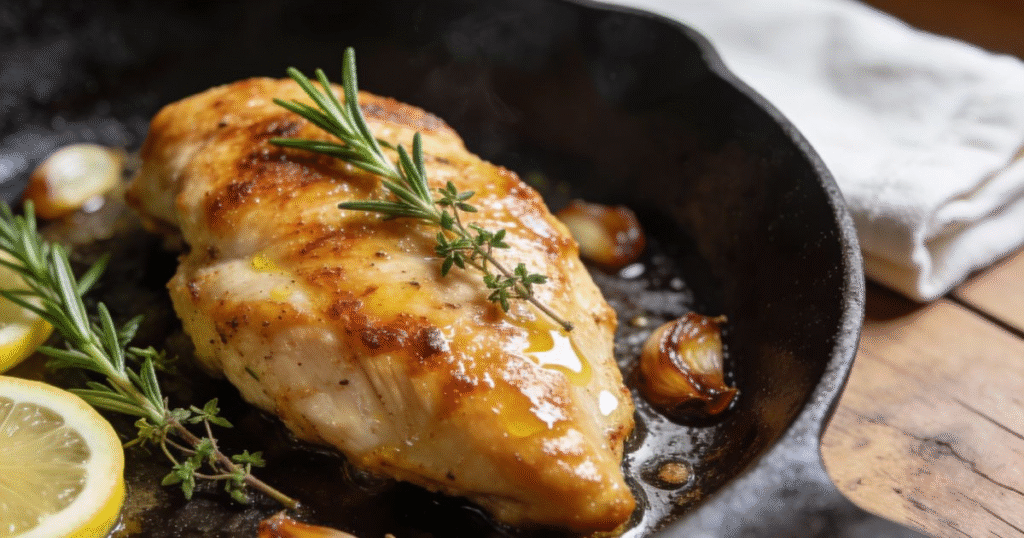
Classic Pan-Fried Chicken – Perfectly Crispy Every Time
Pan-fried chicken achieves a crispy, golden crust just like restaurant-style chicken—without deep frying.This easy pan-fried chicken recipe for beginners uses simple ingredients and one skillet to create juicy, tender meat with an irresistible crunch. You can master how to fry chicken in a pan with oil in just 30 minutes for a quick pan-fried chicken dinner your whole family will love. Whether you choose chicken breasts or thighs, this homemade pan-fried chicken beats takeout every single time.
Why You’ll Love This Recipe
This crispy pan-fried chicken requires no special equipment beyond a heavy skillet. You control the oil amount, making it healthier than traditional deep-fried versions.
The garlic and herb pan-fried chicken has a crispy skin while remaining juicy inside.One bite reveals perfectly seasoned meat that remains moist while the coating crunches satisfyingly.
This recipe works beautifully for meal prep and feeds a crowd without heating your whole kitchen. You can have this one-pan chicken dinner on the table faster than ordering delivery.
Ingredients
For the Chicken
- 4 bone-in, skin-on chicken thighs or breasts
- 1 cup buttermilk
- 2 teaspoons hot sauce
For the Coating
- 1½ cups all-purpose flour
- 2 teaspoons garlic powder
- 2 teaspoons onion powder
- 1 teaspoon smoked paprika
- 1 teaspoon dried thyme
- 1 teaspoon salt
- ½ teaspoon black pepper
- ½ teaspoon cayenne pepper
For Frying
- ½ cup vegetable oil or peanut oil
- 2 tablespoons butter
How to Make This Recipe
Step 1: Marinate the Chicken
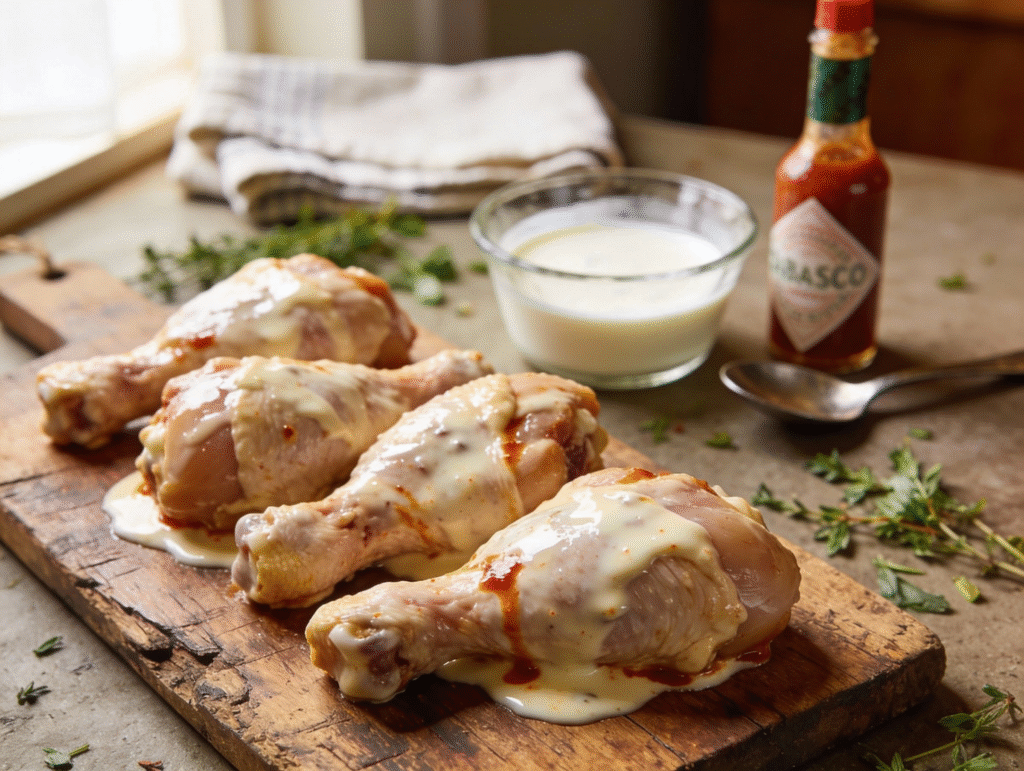
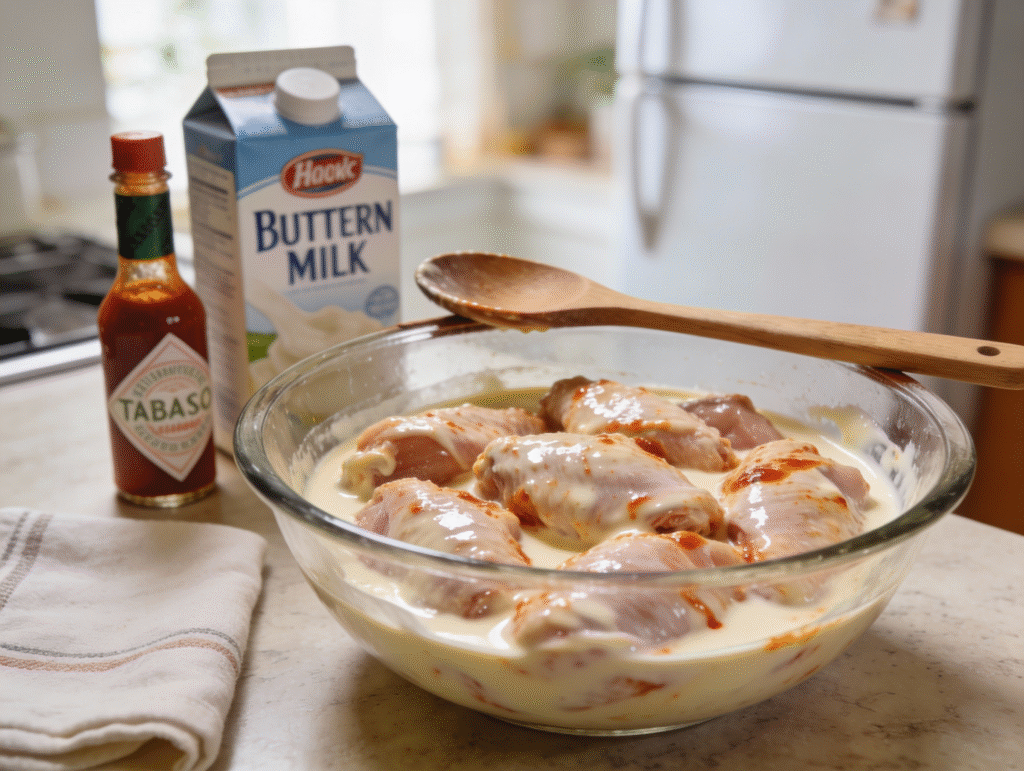
In a large bowl, mix together the buttermilk and hot sauce. Add the chicken pieces and turn them to coat completely.
Cover the mixture and chill in the refrigerator for at least 2 hours or overnight. This buttermilk pan-fried chicken technique tenderizes the meat and adds incredible flavor.
Step 2: Prepare the Coating
Mix flour, garlic powder, onion powder, paprika, thyme, salt, black pepper, and cayenne in a shallow dish. Whisk until the spices are evenly mixed throughout.
Set up your breading station near the stove before you start cooking. This organization makes the frying process smooth and efficient.
Step 3: Coat the Chicken
Remove one piece of chicken from the buttermilk and let excess liquid drip off. Dredge it in the seasoned flour mixture, pressing firmly to help the coating stick.
Make sure you cover every surface, including the edges and underside. Shake off any excess flour and place the coated piece on a clean plate.
Repeat this process with each piece of chicken. Let the coated pieces rest for 10 minutes while the coating sets up properly.
Step 4: Heat the Oil
Pour oil into a large, heavy-bottomed skillet and add butter. Warm the oil over medium-high heat to 350°F.
Test the temperature by dropping a pinch of flour into the oil. It should sizzle immediately when the oil reaches the right temperature.
Step 5: Fry the Chicken
Carefully place chicken pieces skin-side down in the hot oil. Don’t crowd the pan or the temperature will drop too much.
Cook for 7-8 minutes without moving the pieces. The coating needs uninterrupted contact with the hot oil to develop that golden crust chicken lovers crave.
Step 6: Flip and Continue Cooking
Use tongs to carefully flip each piece. The underside should show a deep golden brown color.
Cook the second side for another 7-8 minutes. The internal temperature should reach 165°F when you insert a meat thermometer into the thickest part.
Step 7: Drain and Rest
Move the chicken to a wire rack positioned atop a baking tray. This setup allows air to circulate and keeps the coating crispy.
Allow the chicken to rest for 5 minutes before serving.The juices redistribute during this time, ensuring every bite stays moist.
Cooking Method Variations
Oven-Finished Method
Start the chicken in your skillet as directed above. After browning both sides for 5 minutes each, transfer the skillet to a 375°F oven.
Bake for 15-20 minutes until the chicken reaches 165°F internally. This method reduces splatter and ensures even cooking throughout.
Air Fryer Adaptation
Coat the chicken as directed but spray pieces lightly with cooking oil. Place them in your air fryer basket without overcrowding.
Cook at 380°F for 22-25 minutes, flipping halfway through. The circulating air creates a crispy exterior with much less oil.
Crockpot Alternative
While you can’t achieve the same crispy texture, you can make tender chicken in your slow cooker. Season chicken pieces and place them in the crockpot with a cup of chicken broth.
Simmer on low for 6 to 7 hours, or on high for 3 to 4 hours. For added crispness, brown the cooked chicken quickly in a hot skillet with a tablespoon of oil before serving.
Healthy Low-Oil Method
Use just 2 tablespoons of oil in a nonstick skillet for a healthy pan-fried chicken option. Cook over medium heat for slightly longer to ensure the coating crisps up.
During the final 5 minutes, cover the pan.This traps steam that helps cook the chicken through while using minimal oil.
Storage and Reheating
Storing Leftovers
Cool the chicken completely before storing it in airtight containers. Refrigerate for up to 4 days for best quality and food safety.
Place parchment paper between pieces to prevent them from sticking together. This makes grabbing individual portions much easier later.
Freezing Instructions
Wrap each piece of cooled chicken individually in plastic wrap, then place in freezer bags. Press out excess air before sealing the container.
Freeze for up to 3 months for optimal taste and texture. Label bags with the date so you track freshness accurately.
Reheating for Crispy Results
Reheat chicken in a 375°F oven for 15-20 minutes until heated through. Place pieces on a wire rack over a baking sheet for maximum crispness.
Avoid microwaving if you want to maintain the crispy coating. The microwave creates steam that makes the breading soggy instead of crunchy.
Thaw frozen chicken in the refrigerator overnight before reheating. This ensures even warming without overcooking the exterior.
Tips, Tricks, and Serving Suggestions
Choosing the Right Chicken
Pan-fried chicken thighs stay juicier than breasts because of their higher fat content. They’re more forgiving if you accidentally cook them a bit longer.
Pan-fried chicken breast works beautifully when you don’t overcook it. Pound thicker pieces to even thickness so they cook at the same rate.
Bone-in, skin-on pieces deliver the most authentic crispy skillet chicken experience. The bones add flavor while the skin crisps beautifully in the hot oil.
Perfecting Your Breading Technique
Use one hand for wet ingredients and the other for dry ingredients. This prevents the coating from clumping on your fingers during the breading process.
Press the flour mixture firmly onto the chicken for maximum adhesion. Gentle coating leads to patchy results with bare spots.
Let coated chicken rest before frying. This resting period allows the coating to bond with the meat so it doesn’t fall off during cooking.
Oil Temperature Management
Maintain oil temperature between 325-350°F throughout cooking. Too hot burns the coating before the meat cooks through.
Add chicken gradually to avoid temperature drops. When oil cools too much, the coating absorbs excess grease instead of crisping.
Use a thermometer for accuracy rather than guessing. Consistent temperature produces the most reliable results every time.
Creating Extra Crispy Coating
Double-dredge your chicken for an extra-thick, crunchy crust. Dip coated pieces back in buttermilk, then flour again before frying.
Add cornstarch to your flour mixture for incredible crispness. Replace ¼ cup flour with cornstarch for a lighter, crunchier texture.
Let buttermilk-soaked chicken come to room temperature before coating. Cold chicken creates condensation that makes the coating slide off.
Seasoning Variations
Make classic pan-fried chicken with your favorite herb combinations. Fresh rosemary, sage, or oregano work beautifully in the flour mixture.
Add lemon zest to the coating for bright, fresh flavor. The citrus cuts through the richness of the fried coating perfectly.
Try ranch seasoning mix or Cajun spices for different flavor profiles. These shortcuts add complex taste without measuring multiple ingredients.
Serving This Quick Chicken Meal
Serve this skillet chicken recipe with mashed potatoes and gravy for ultimate comfort food. The creamy sides complement the crispy texture beautifully.
Pan-fried chicken served with vegetables or sides makes a balanced meal. Roasted Brussels sprouts, green beans, or corn on the cob all pair wonderfully.
Create chicken dinner recipes by slicing the meat over salads. The warm, crispy chicken transforms simple greens into a satisfying main course.
Making It a Complete Meal
Cook vegetables in the same skillet after removing the chicken. The flavorful oil adds incredible taste to whatever you cook next.
Serve with biscuits and honey for a Southern-inspired feast. The sweet honey balances the savory, seasoned chicken perfectly.
Add coleslaw and potato salad for a picnic-style spread. These cool, creamy sides provide textural contrast to the hot, crispy chicken.
Meal Prep and Lunch Ideas
This protein-rich chicken recipe works perfectly for weekly meal prep. Cook a large batch on Sunday for easy lunches throughout the week.
Pack chicken pieces with roasted sweet potatoes and steamed broccoli. These containers reheat well and stay delicious for days.
Shred leftover chicken for sandwiches, wraps, or grain bowls. The crispy coating adds texture even after you break it into smaller pieces.
Wine and Beverage Pairings
Pair this classic pan-fried chicken with Chardonnay or Riesling for a sophisticated dinner.The acidity in the wine balances the richness perfectly.
Cold beer complements fried chicken naturally. Pilsners, lagers, or wheat beers all work wonderfully with the savory coating.
Sweet tea or lemonade provides traditional Southern accompaniment. These refreshing drinks cleanse your palate between bites.
Troubleshooting Common Issues
If your coating falls off, you didn’t let the breaded chicken rest long enough. Always wait 10 minutes before frying.
Burnt exterior with raw interior means your oil was too hot. Lower the heat and cook more slowly for even results.
Greasy chicken indicates the oil temperature dropped too low. The coating absorbed oil instead of frying crisply at the proper temperature.
Healthier Preparation Options
Remove the skin before breading for a healthy low-oil pan-fried chicken recipe. You sacrifice some crispness but save significant calories.
Coat the chicken with whole wheat or almond flour. These alternatives add fiber and nutrients while maintaining good texture.
Bake coated chicken on a wire rack instead of frying. Spray with cooking oil and bake at 425°F for similar crispness with less fat.
Making It Family-Friendly
Reduce or omit the cayenne pepper for kids who don’t like spice. The other seasonings still deliver plenty of flavor.
Let children help with the breading process. They love the hands-on activity and feel proud eating something they helped make.
Cut chicken into strips or nuggets for smaller hands. These pieces cook faster and feel less intimidating for young eaters.
Scaling for Crowds
This recipe doubles or triples easily for weeknight family dinner gatherings. Just work in batches so you don’t overcrowd your pan.
Keep finished pieces warm in a 200°F oven while you cook the rest. Place them on a wire rack so they stay crispy.
Set up a buffet with various sides and let guests build their own plates. This casual approach works beautifully for larger groups.
FAQs
How do you keep pan-fried chicken crispy?
Place cooked chicken on a wire rack to drain instead of using paper towels. The air circulation prevents steam from softening the coating. Store cooled chicken uncovered in the refrigerator for the first hour.
What’s the difference between pan-fried and deep-fried chicken?
Pan-fried chicken uses less oil in a skillet and requires flipping. Deep-fried chicken submerges completely in oil. Pan frying creates crispy chicken that stays juicy without special equipment.
How long does it take to fry chicken in a pan?
Chicken fried in a pan takes 14-16 minutes total, about 7-8 minutes per side. Thicker pieces need slightly longer. Make sure the internal temperature reaches 165°F.
Can you make crispy pan-fried chicken without buttermilk?
Yes, substitute regular milk mixed with a tablespoon of lemon juice or vinegar. Let it sit for 5 minutes to create a buttermilk substitute that tenderizes effectively.
Recipe Card
Prep Time: 15 minutes
Marinating Time: 2 hours
Cook Time: 16 minutes
Total Time: 2 hours 31 minutes
Servings: 4
Ingredients
- 4 bone-in chicken pieces
- 1 cup buttermilk
- 2 teaspoons hot sauce
- 1½ cups all-purpose flour
- 2 teaspoons garlic powder
- 2 teaspoons onion powder
- 1 teaspoon smoked paprika
- 1 teaspoon dried thyme
- 1 teaspoon salt
- ½ teaspoon black pepper
- ½ teaspoon cayenne pepper
- ½ cup vegetable oil
- 2 tablespoons butter
Instructions
- Mix buttermilk and hot sauce in a bowl
- Add chicken and marinate 2 hours or overnight
- Combine flour and all spices in a shallow dish
- Remove chicken from buttermilk and coat thoroughly in flour mixture
- Let coated chicken rest 10 minutes
- Heat oil and butter in a large skillet to 350°F
- Place chicken skin-side down and cook 7-8 minutes
- Flip and cook another 7-8 minutes until internal temperature reaches 165°F
- Let the chicken drain on a wire rack, then rest 5 minutes prior to serving.
Notes
Use a meat thermometer for accuracy. Don’t move chicken during initial cooking for maximum crispness. Adjust cayenne based on heat preference. Works with both chicken thighs and breasts.