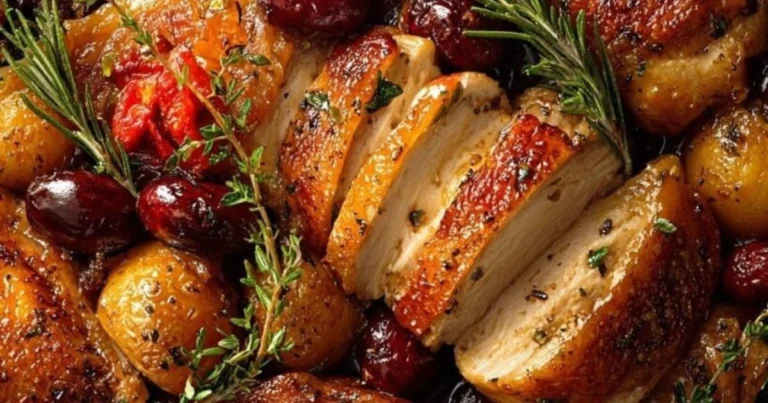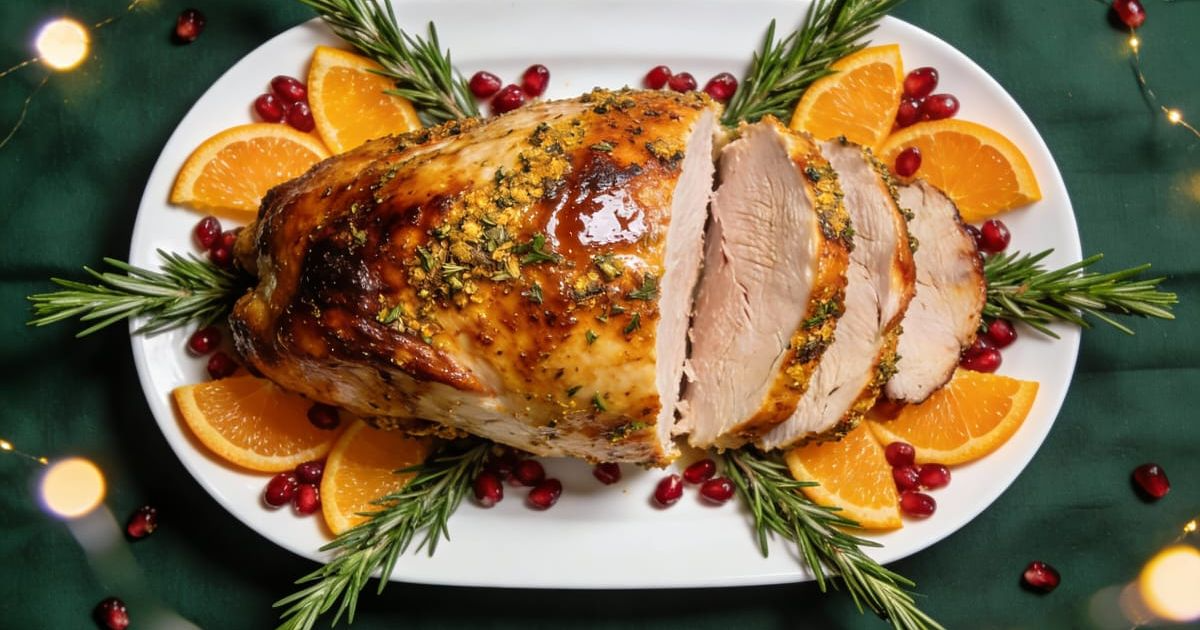
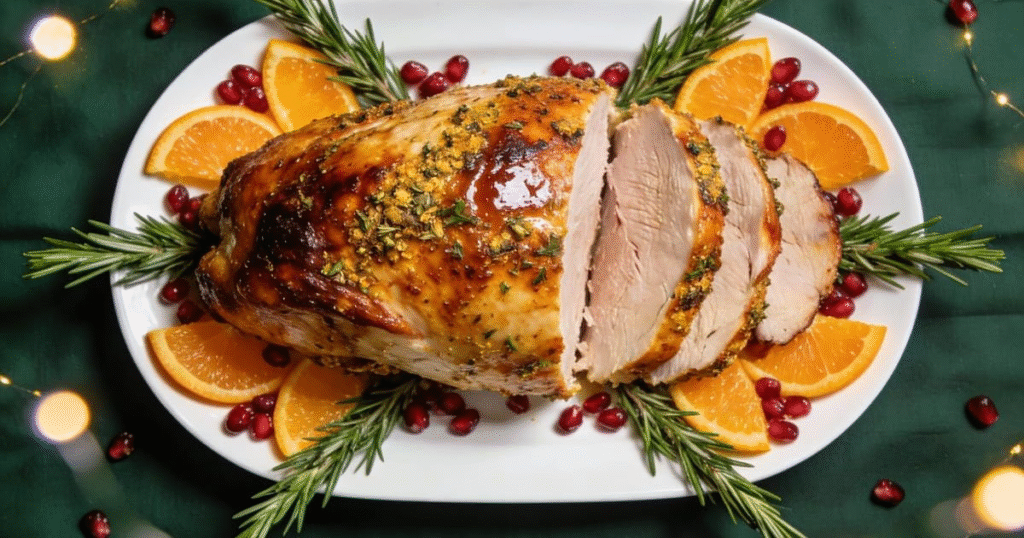
The Best Oven Roasted Turkey Breast: Juicy, Simple, Foolproof
Have you ever wondered why nearly 47% of home cooks report dry, disappointing turkey as their biggest holiday cooking failure, yet professional chefs consistently produce succulent, golden-perfection poultry every single time? The secret lies not in expensive equipment or culinary school training, but in mastering a foolproof oven roasted turkey breast technique that delivers restaurant-quality results in your home kitchen. This streamlined approach to Christmas dinner eliminates the stress of wrestling with a massive whole bird while guaranteeing tender, flavorful meat that keeps your guests reaching for seconds throughout your festive celebration.
An oven roasted turkey breast offers the perfect solution for smaller gatherings, white-meat preferences, or hosts seeking simplified holiday cooking without sacrificing tradition or taste. Unlike full turkey preparations that demand hours of attention and complex carving skills, this recipe focuses exclusively on the prized breast meat, reducing cooking time by approximately 60% while maintaining all the celebratory flavors your Christmas dinner deserves. The result? Juicy, herb-infused turkey with crispy golden skin that becomes your new go-to centerpiece for holiday entertaining, special occasions, or any time you crave the comfort of traditional turkey without the overwhelming commitment.
Ingredients List
For the Turkey Breast:
- 1 bone-in, skin-on turkey breast (5-7 pounds) – yields approximately 8-10 servings
- 4 tablespoons unsalted butter, softened – or olive oil for dairy-free option
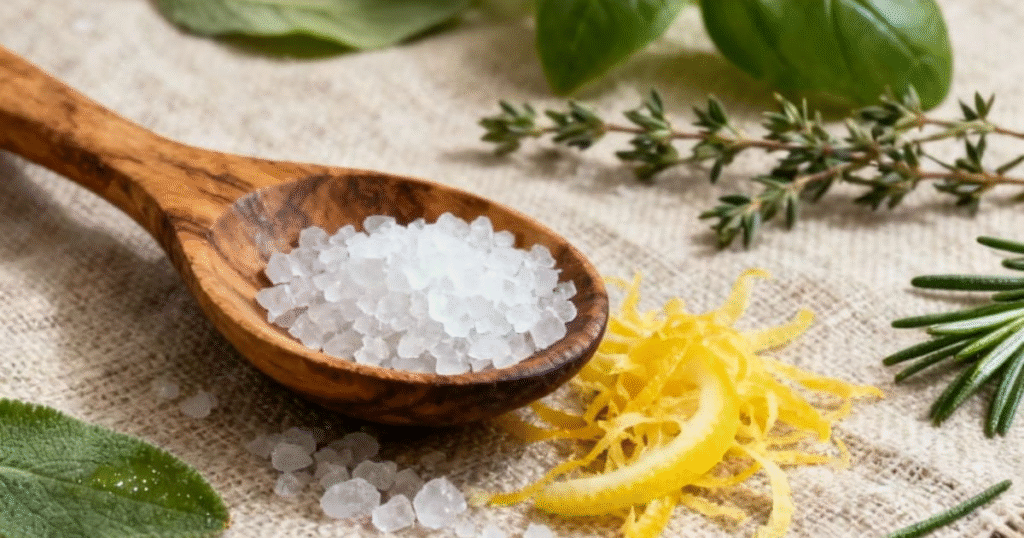
- 3 tablespoons fresh sage, finely chopped – or 1½ tablespoons dried sage
- 2 tablespoons of fresh thyme leaves, or substitute with 1 tablespoon of dried thyme
- 1 tablespoon fresh rosemary, minced – or 1½ teaspoons dried rosemary
- 5 cloves garlic, minced – freshly minced provides superior aromatic impact
- 2 teaspoons kosher salt – plus additional for initial seasoning
- 1 teaspoon freshly ground black pepper
- 1 teaspoon smoked paprika – adds depth and beautiful color
- ½ teaspoon onion powder
- Zest of 1 lemon – brightens rich flavors beautifully
For the Basting Liquid:
- 2½ cups low-sodium chicken or turkey stock – homemade elevates flavor significantly
- 3 tablespoons melted butter
- 2 tablespoons apple cider – adds subtle sweetness and acidity
- 2 bay leaves
- 1 sprig fresh rosemary
- 1 sprig fresh thyme
For the Pan Gravy:
- Pan drippings from roasted turkey
- 3 tablespoons all-purpose flour – or cornstarch for gluten-free
- 2-3 cups turkey or chicken stock – adjust for desired consistency
- 2 tablespoons butter – for luxurious silkiness
- Salt and pepper to taste
- Fresh herbs for garnish
Substitution Suggestions: For a boneless turkey breast, reduce cooking time by 20-25%. Replace butter with herb-infused olive oil or avocado oil for dairy-free preparation. Use poultry seasoning blend if fresh herbs aren’t available (2 tablespoons total). Substitute apple cider with additional stock and 1 tablespoon of lemon juice for similar flavor complexity.
Timing
Preparation Time: 15 minutes (including herb butter preparation)
Cooking Time: 90-120 minutes (approximately 15-20 minutes per pound at 350°F)
Resting Time: 15-20 minutes (essential for juice retention)
Total Time: Approximately 2 hours 30 minutes
This timing represents approximately 60% less total cooking time than traditional whole turkey preparations, freeing up valuable oven space for side dishes and desserts. The simplified approach means you’ll spend less time monitoring temperatures and more time enjoying your guests’ company during the holiday celebration.
Step-by-Step Instructions
Step 1: Prep Your Turkey Breast for Success
Remove your turkey breast from refrigeration 45-60 minutes before cooking, allowing it to reach room temperature for even cooking throughout. Pat the entire surface completely dry using paper towels—this critical step ensures crispy, golden skin rather than rubbery, steamed texture. If your turkey breast comes with the skin tucked under, gently loosen it with your fingers, creating a pocket for herb butter without tearing the delicate skin. Position your oven rack in the lower-middle section and preheat to 350°F.
Pro Insight: Room temperature poultry cooks up to 30% more evenly than refrigerator-cold meat, preventing overcooked exterior with undercooked interior.
Step 2: Create the Aromatic Herb Butter
In a medium bowl, combine softened butter, sage, thyme, rosemary, minced garlic, salt, pepper, smoked paprika, onion powder, and lemon zest, mixing thoroughly until you create a fragrant, well-incorporated paste. This compound butter serves double duty—flavoring the meat from beneath the skin while creating a protective moisture barrier that promotes even browning. The aromatic combination penetrates deep into the turkey breast during roasting, infusing every slice with herbaceous complexity.
Chef’s Secret: Making herb butter 24 hours ahead allows flavors to meld and intensify, creating even more pronounced herbal notes throughout your turkey.
Step 3: Apply Herb Butter with Precision
Carefully slide your fingers between the turkey skin and meat, creating pockets on both sides of the breast without tearing the skin. Distribute approximately two-thirds of your herb butter under the skin, massaging gently to spread evenly across the entire breast surface. This placement ensures direct flavor contact with the meat while the skin protects it from drying during roasting. Rub the remaining herb butter over the exterior skin, coating thoroughly for maximum flavor and beautiful golden color.
Technique Tip: Work slowly and deliberately when loosening skin—rushing increases tearing risk, which compromises both appearance and moisture retention.
Step 4: Prepare the Roasting Environment
Place the prepared turkey breast on a roasting rack inside a sturdy roasting pan. Pour chicken stock and apple cider into the pan bottom (not over the turkey), adding bay leaves, rosemary sprig, and thyme sprig to the liquid. This aromatic bath creates a humid roasting environment that prevents drying while contributing subtle flavor complexity. The elevated rack ensures hot air circulation around the entire breast, promoting even cooking and crispy skin development on all surfaces.
Moisture Management: The liquid creates steam that keeps the roasting environment humid, but keeping it below the rack (not touching the meat) prevents soggy, steamed skin.
Step 5: Roast to Golden Perfection
Place your prepared turkey breast in the preheated 350°F oven. Roast for approximately 15-20 minutes per pound, basting every 30 minutes with the pan liquid using a turkey baster or large spoon. This regular basting reinforces moisture, enhances flavor, and promotes even browning. Begin checking internal temperature after 75 minutes using an instant-read thermometer inserted into the thickest part of the breast without touching bone. Your target temperature is 160°F—the turkey will reach the safe 165°F during resting through carryover cooking.
Temperature Guide for Turkey Breast:
- 160°F = Remove from oven (ideal—reaches 165°F during resting)
- 165°F = USDA safe minimum (but risks slight dryness if removed at this temp)
- 170°F = Overcooked (noticeably dry texture)
Step 6: Tent and Rest—The Game-Changing Step
Once your thermometer reads 160°F in the thickest portion, immediately transfer the turkey breast to a cutting board. Tent loosely with aluminum foil and let rest undisturbed for 15-20 minutes. During this crucial resting period, muscle fibers relax and reabsorb moisture that would otherwise flood your cutting board, resulting in slices that are approximately 35% juicier than immediately carved turkey. Resist the temptation to carve early—patience is rewarded with superior texture and flavor.
Science Behind Resting: High heat causes muscle proteins to contract and expel moisture. Resting allows proteins to relax and reabsorb liquid, redistributing juices evenly throughout the meat.
Step 7: Craft Restaurant-Quality Pan Gravy
While your turkey rests, prepare the gravy. Pour pan drippings through a fine-mesh strainer into a fat separator or measuring cup, allowing fat to rise to the surface. Return 3 tablespoons of fat to the roasting pan over medium heat (spanning two burners if necessary). Whisk in flour, cooking for 2-3 minutes until golden and fragrant, creating a roux that will thicken your gravy. Gradually add strained drippings and additional stock, whisking constantly to prevent lumps. Bring to a gentle simmer, stirring occasionally until thickened to desired consistency (5-7 minutes). Finish by whisking in butter for luxurious sheen and silky mouthfeel. Season with salt and pepper, then strain again for velvety smoothness.
Step 8: Carve with Confidence
Remove and discard the string or netting if present. Using a sharp carving knife, locate the breastbone running down the center. Starting at one side, make long, smooth cuts parallel to the rib cage, following the bone’s natural curve to remove one breast half. Repeat on the opposite side. Place each breast half flat on your cutting board and slice across the grain into ½-inch thick pieces. Cutting against the grain (perpendicular to muscle fibers) ensures maximum tenderness in every bite.
Presentation Tip: Arrange slices in overlapping rows on a warmed platter, fanning them attractively and garnishing with fresh herbs for visual appeal worthy of your culinary effort.
Nutritional Information
Per Serving (based on 10 servings, approximately 5 oz turkey with 2 oz gravy):
- Calories: 285 kcal
- Total Fat: 11g (17% Daily Value)
- Saturated Fat: 5g
- Trans Fat: 0g
- Cholesterol: 115mg (38% DV)
- Sodium: 420mg (18% DV)
- Total Carbohydrates: 3g (1% DV)
- Dietary Fiber: 0g
- Sugars: 0.5g
- Protein: 42g (84% DV)
- Vitamin B6: 35% DV
- Niacin (B3): 65% DV
- Selenium: 58% DV
- Phosphorus: 30% DV
- Zinc: 15% DV
Nutritional Highlights: Turkey breast ranks among the leanest protein sources available, providing exceptional amounts of complete protein with minimal fat compared to dark meat or other poultry options. It’s extraordinarily rich in B vitamins (particularly niacin and B6) essential for energy metabolism and nervous system function. The selenium content supports thyroid health and provides powerful antioxidant protection, while the high protein-to-calorie ratio makes it ideal for health-conscious holiday dining.
Healthier Alternatives for the Recipe
Reduce Fat Content: Use only 2 tablespoons of butter in the herb mixture and substitute the remainder with Greek yogurt mixed with herbs, reducing total fat by approximately 40% while maintaining moisture and flavor. Remove skin before serving to eliminate roughly 50% of the total fat content.
Lower Sodium Strategy: Choose no-salt-added or low-sodium stock and reduce added salt by half, allowing diners to season individual portions according to preference. Fresh herbs provide abundant flavor without relying on sodium, making this naturally adaptable for low-sodium diets.
Increase Vegetable Integration: Surround your turkey breast with quartered onions, whole garlic cloves, carrots, celery, and Brussels sprouts during roasting. These vegetables absorb flavorful pan drippings while adding fiber, vitamins, and colorful visual appeal to your serving platter.
Gravy Modification: Replace half the butter in gravy with pureed roasted garlic or cauliflower for creamy texture with reduced fat. Use cornstarch instead of flour as a thickener—it requires less fat and creates equally silky consistency.
Skinless Alternative: While skin provides flavor and moisture protection, removing it before serving reduces fat and calories significantly. Compensate by using a slightly lower roasting temperature (325°F) and basting more frequently to maintain moisture.
Portion Awareness: Slice turkey slightly thinner (⅓-inch instead of ½-inch) to create visual abundance while naturally reducing portion sizes by 20-25% without anyone feeling deprived.
Herb-Infused Stock: Create a more flavorful basting liquid by steeping fresh herbs in warm stock for 15 minutes before using, intensifying herbal notes without additional calories or sodium.
Serving Suggestions
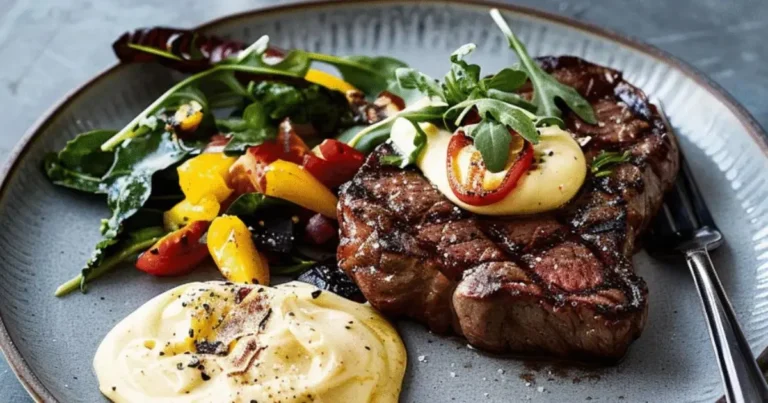
Traditional Christmas Presentation: Serve your oven roasted turkey breast alongside classic holiday accompaniments including sage and sausage stuffing, creamy mashed potatoes, green bean casserole, cranberry sauce, and roasted root vegetables. The familiar combination creates nostalgic comfort while allowing the turkey’s herb-infused flavor to shine as the centerpiece.
Contemporary Holiday Spread: Pair sliced turkey with modern sides like quinoa and wild rice pilaf studded with dried cranberries and pecans, roasted butternut squash with maple glaze, shaved Brussels sprouts salad with pomegranate seeds, and garlic-herb roasted fingerling potatoes for a lighter, updated Christmas dinner.
Make-It-Interactive Carving Station: Present the whole roasted turkey breast on a beautiful wooden board surrounded by fresh herbs, allowing guests to watch the carving process. Offer an array of condiments including cranberry-orange relish, whole-grain mustard, herb aioli, and apple chutney for personalized flavor customization.
Beverage Pairing Recommendations: Sparkling apple cider complements turkey breast beautifully with its crisp acidity and subtle sweetness. Consider cranberry-pomegranate juice, spiced pear cider, or herb-infused lemonade for refreshing accompaniments that enhance rather than overpower the delicate poultry flavors.
Leftover Innovation: Transform remaining turkey into gourmet turkey and cranberry panini, hearty turkey soup with vegetables and wild rice, creamy turkey pot pie with puff pastry topping, or turkey club sandwiches with bacon, avocado, and herb aioli for post-holiday meals.
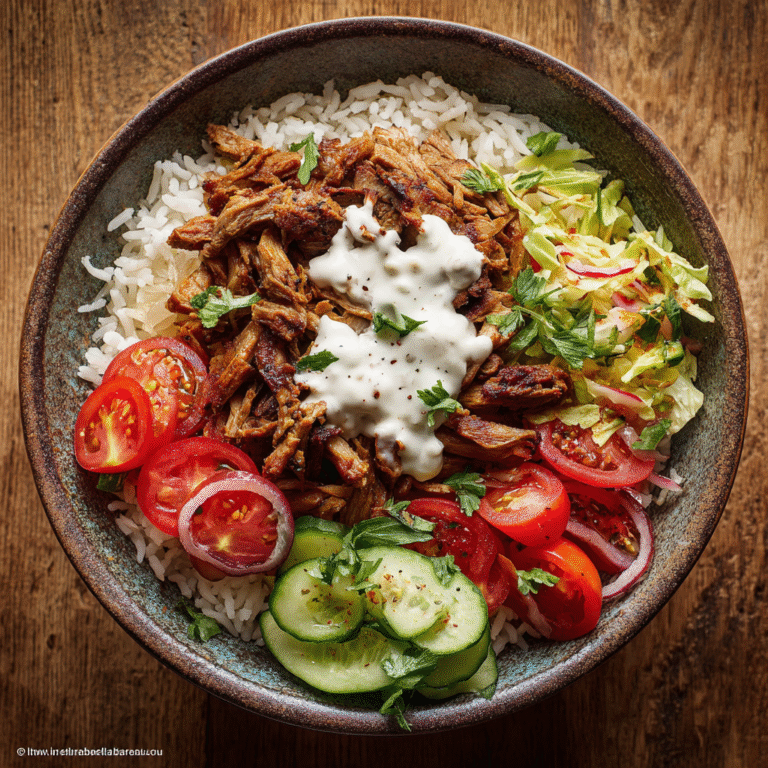
Global-Inspired Variations: Use leftover turkey in turkey mole tacos, Asian-inspired turkey lettuce wraps with hoisin sauce, Mediterranean turkey grain bowls with tzatziki, or Italian turkey Tetrazzini with mushrooms and Parmesan cream sauce.
Family-Style Platter: Create an impressive presentation by arranging sliced turkey on a large serving platter surrounded by roasted vegetables, fresh cranberries, orange slices, and herb sprigs for a visually stunning centerpiece that encourages communal sharing.
Common Mistakes to Avoid
Starting with Frozen or Cold Turkey: Roasting turkey straight from the refrigerator results in uneven cooking—dry, overcooked exterior with undercooked center. Always allow 45-60 minutes for room temperature adjustment before roasting.
Overcooking Past 165°F: Turkey breast contains minimal fat compared to dark meat, making it unforgiving when overcooked. Studies show that turkey cooked beyond 170°F loses up to 25% of its moisture content. Remove at 160°F for carryover cooking to reach the safe 165°F during resting.
Skipping the Resting Period: Cutting immediately after removing from the oven causes dramatic juice loss—up to 40% by some estimates. Those 15-20 minutes of resting make the difference between dry, disappointing turkey and succulent, flavorful slices.
Inadequate Seasoning Under the Skin: Surface seasoning alone provides limited flavor penetration. Placing herb butter directly against the meat under the protective skin ensures flavor infusion throughout the breast rather than just on the exterior.
Basting Too Frequently: While basting adds moisture and flavor, opening the oven every 10-15 minutes drops temperature significantly, extending cooking time and risking uneven results. Limit basting to 30-minute intervals for optimal balance.
Using a Dull Carving Knife: Sharp knives create clean slices that maintain structural integrity and aesthetic appeal, while dull blades tear delicate turkey fibers, releasing precious juices and creating ragged, unprofessional-looking portions.
Ignoring Carryover Cooking: Internal temperature continues rising 5-10°F after removal from the oven. Failing to account for this results in overcooked, dry turkey by the time it reaches the table.
Positioning Skin-Side Down: Some cooks mistakenly roast turkey breast skin-side down, thinking it will self-baste. This creates soggy, pale skin instead of the crispy, golden exterior everyone craves. Always roast skin-side up on a rack.
Forgetting to Pat Dry: Moisture on the turkey surface creates steam rather than allowing proper browning. Thoroughly drying the skin before seasoning is essential for achieving that coveted golden, crispy exterior.
Storing Tips for the Recipe
Immediate Refrigeration Protocol: Allow leftover turkey to cool to room temperature within 2 hours of cooking, then carve remaining meat from the bone. Store sliced turkey in airtight containers or wrap tightly in aluminum foil, separating layers with parchment paper to prevent sticking. Properly stored turkey maintains optimal quality for 3-4 days refrigerated at 40°F or below.
Optimal Reheating Technique: Place sliced turkey in a baking dish with several tablespoons of chicken stock or gravy to maintain moisture. Cover tightly with foil and reheat in a 325°F oven for 15-20 minutes until warmed through. This gentle method prevents additional moisture loss that microwave reheating causes.
Freezing Guidelines: For longer storage, wrap individual portions tightly in plastic wrap, then aluminum foil, or use vacuum-sealed bags to prevent freezer burn. Frozen turkey breast maintains quality for 2-3 months. Include a small amount of gravy or stock in each package to help preserve moisture during freezing and reheating.
Gravy Storage Solutions: Store turkey gravy separately in airtight containers for up to 4 days refrigerated or 3 months frozen. Reheat gently on the stovetop over low heat, whisking frequently and adding stock if needed to restore desired consistency.
Maximize Bone Usage: Don’t discard that turkey breast bone! Use it to make rich, flavorful homemade turkey stock by simmering with vegetables, herbs, and water for 2-3 hours. Strain and freeze in portions for future soups, gravies, and risottos.
Make-Ahead Strategy: Prepare herb butter up to 3 days in advance and store refrigerated, bringing to room temperature before applying to turkey. You can also season the turkey breast the night before, wrapping it tightly and refrigerating overnight for deeper flavor penetration.
Portioning for Storage: Divide leftover turkey into meal-sized portions before freezing—this allows you to thaw only what you need rather than the entire batch, maintaining better quality and reducing waste.
Label Everything: Always label stored turkey with the date and contents. This simple practice prevents mystery containers and ensures you use older items first, maintaining food safety and quality standards.
Conclusion
This oven roasted turkey breast combines traditional holiday elegance with remarkably straightforward preparation, delivering a tender, flavorful centerpiece that transforms your Christmas dinner into an unforgettable culinary experience without the overwhelming commitment of a whole bird. The aromatic herb butter creates a protective, flavorful layer that infuses every slice with festive complexity, while the simplified roasting method ensures perfect doneness and crispy golden skin that rivals any restaurant presentation. With strategic timing that frees up valuable oven space and attention for side dishes, this recipe proves that impressive holiday cooking doesn’t require complicated techniques or constant supervision—just quality ingredients, proper technique, and the confidence to create memorable moments around your table.
Ready to create your most stress-free, delicious Christmas dinner yet? Try this oven roasted turkey breast recipe and share your results in the review section below—we’d love to hear how your festive turkey turned out! Don’t forget to leave a comment sharing your favorite serving suggestions, creative leftover transformations, or any tips you discovered along the way. Subscribe for more holiday recipes and cooking inspiration delivered straight to your inbox. Happy holidays and happy cooking!
FAQs
Q: Can I prepare this oven roasted turkey breast recipe a day ahead?
A: While the turkey itself is best cooked the day of serving for optimal texture and moisture, you can prepare the herb butter up to 3 days in advance and store it refrigerated. You can also season your turkey breast the night before by applying the herb butter under and over the skin, then wrapping tightly and refrigerating overnight. This allows flavors to penetrate more deeply. Bring to room temperature 45-60 minutes before roasting.
Q: What’s the difference between bone-in and boneless turkey breast for roasting?
A: Bone-in turkey breast generally produces juicier, more flavorful results because the bone conducts heat and helps the meat cook more evenly while adding flavor. It also takes longer to cook (15-20 minutes per pound). Boneless turkey breast cooks faster (12-15 minutes per pound) and is easier to carve, but requires more careful monitoring to prevent drying. Both work excellently with this recipe when adjusted accordingly.
Q: How do I know when my turkey breast is perfectly cooked?
A: An instant-read meat thermometer is essential for perfect results—visual cues alone are unreliable.Place the thermometer in the thickest section of the breast, making sure it doesn’t touch any bone.Remove the turkey at 160°F internal temperature, as it will continue cooking to the safe 165°F during the crucial 15-20 minute resting period through carryover cooking. Never cook beyond 165°F or you’ll risk dry, overcooked meat.
Q: Why is my gravy lumpy and how can I fix it?
A: Lumps develop when the flour isn’t fully mixed with the fat first, or when the liquid is poured in too fast. Prevent lumps by whisking flour into fat thoroughly for 2-3 minutes before adding any liquid, then adding liquid gradually in small amounts while whisking constantly. Fix existing lumps by straining gravy through a fine-mesh sieve or pulsing briefly with an immersion blender until smooth.
Q: Can I cook a larger or smaller turkey breast with this recipe?
A: Absolutely! This recipe scales beautifully. For smaller 3-4 pound breasts serving 4-6 people, reduce cooking time accordingly but maintain the 15-20 minutes per pound guideline. For larger 8-9 pound breasts, increase cooking time but always rely on internal temperature rather than timing alone. The herb butter and basting liquid proportions work well across all sizes.
Q: What should I do if my turkey skin is browning too quickly?
A: If the skin begins browning too rapidly before the turkey reaches the proper internal temperature, tent it loosely with aluminum foil to slow browning while allowing the interior to continue cooking. This commonly occurs in the last 30-45 minutes of roasting. Remove the foil during the final 10 minutes if you want to crisp the skin further.
Q: Is it safe to stuff herbs under the turkey skin?
A: Yes! Placing herb butter under the skin is completely safe and is actually a professional technique for infusing maximum flavor directly into the meat. The skin acts as a protective barrier, keeping the herbs moist and preventing them from burning while intensifying their aromatic properties throughout the turkey breast.
Q: Can I swap dried herbs for fresh?
A: Yes, dried herbs work well as a substitute. Use approximately half the amount of dried herbs compared to fresh (1½ tablespoons dried sage instead of 3 tablespoons fresh, for example) as dried herbs have more concentrated flavor. Mix dried herbs with the softened butter thoroughly, allowing them to rehydrate slightly before applying to the turkey for best results.
Q: What’s the best way to get crispy skin on my turkey breast?
A: Crispy skin requires three key elements: completely dry skin before roasting (pat thoroughly with paper towels), adequate fat coating (herb butter over the exterior), and proper air circulation (always use a roasting rack). Avoid basting too frequently, as excessive opening of the oven door reduces temperature and creates steam that softens skin. Baste every 30 minutes maximum for the best balance of moisture and crispiness.
Q: How long should a turkey roast when using a roaster oven?
A: A turkey cooked in a countertop roaster oven typically takes 15–20 minutes per pound at 325°F. Roaster ovens cook slightly faster than traditional ovens due to more even, enclosed heat. Always rely on temperature: the turkey is done when it reaches 165°F in the thickest part of the breast.
Q: How long should I cook a turkey in an electric roaster?
A: In an electric roaster, expect about 13–18 minutes per pound at 325°F. These appliances often reduce cooking time because they maintain consistent moisture and heat. For food safety, check that the internal temperature reaches 165°F before serving. Avoid opening the lid during cooking, as heat loss can extend cooking time significantly.